A home-based setup for capturing and manipulating audio signals is often referred to as an independently constructed recording environment. This typically involves utilizing readily available or affordable equipment within a domestic space to produce professional-quality recordings. An example might be converting a spare room into a sound-treated area equipped with microphones, audio interfaces, and digital audio workstations.
Establishing such a personalized workspace offers significant advantages. It empowers creators with complete control over the recording process, fostering experimentation and artistic exploration without the constraints of commercial studio time or external engineers. Historically, the accessibility of these environments has democratized music production, allowing independent artists and smaller bands to create and distribute their work more readily, circumventing traditional industry gatekeepers. This leads to significant cost savings and fosters a more personalized creative experience.
The following sections will delve into the crucial components needed for setting up an optimized and functional version of this personalized recording area, including considerations for acoustic treatment, essential equipment selection, and effective recording techniques.
Essential Tips for Establishing a Personalized Recording Environment
Creating a functional and effective home recording space requires careful planning and execution. The following tips offer guidance on optimizing the sound quality and workflow within an independently constructed recording area.
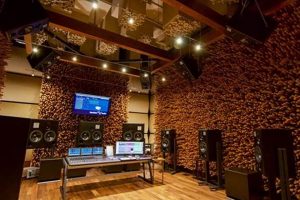
Tip 1: Acoustic Treatment is Paramount: Untreated rooms introduce unwanted reflections and reverberations, negatively impacting sound clarity. Employ acoustic panels, bass traps, and diffusers strategically to minimize these effects. Placement should address first reflection points and areas prone to bass buildup.
Tip 2: Microphone Selection Based on Application: Different microphones excel in different scenarios. Condenser microphones are generally suitable for vocals and acoustic instruments due to their sensitivity and detail, while dynamic microphones handle louder sources like drums and guitar amplifiers more effectively.
Tip 3: Interface and Preamplifier Quality Matters: The audio interface serves as the bridge between microphones and the computer. Investing in an interface with high-quality preamplifiers ensures a clean and transparent signal, minimizing noise and distortion.
Tip 4: Monitor Placement and Calibration are Critical: Position studio monitors in an equilateral triangle with the listening position. Utilize acoustic calibration software to compensate for room anomalies and ensure accurate frequency response.
Tip 5: Cable Management and Organization: A well-organized workspace minimizes distractions and potential issues. Implement proper cable management techniques to prevent interference and ensure easy access to equipment.
Tip 6: Software Familiarity is Key: Mastering a digital audio workstation (DAW) is essential. Experiment with various DAWs to determine the best fit for individual workflow preferences and musical styles. Focus on understanding fundamental concepts like mixing, mastering, and editing techniques.
Tip 7: Regular Calibration and Maintenance: Periodically calibrate equipment and maintain cables to ensure optimal performance and prevent unforeseen technical issues. This includes cleaning microphone capsules, checking cable connections, and updating software regularly.
Implementing these strategies will significantly improve the sonic quality and efficiency within an independently constructed recording environment, facilitating a more productive and enjoyable creative process.
The subsequent sections will explore specific equipment recommendations and advanced techniques for maximizing the potential of a personalized recording area.
1. Acoustic Environment
Within an independently constructed recording environment, the acoustic properties of the space exert a profound influence on the sonic characteristics of recorded material. Optimizing the acoustic environment is therefore crucial for achieving professional-quality results.
- Room Dimensions and Modal Resonances
The physical dimensions of a room directly influence its modal frequencies. Parallel surfaces can create standing waves, resulting in uneven frequency response and inaccurate monitoring. Careful consideration of room ratios and the application of bass traps can mitigate these issues. For example, a room with similar length, width, and height will exhibit pronounced modal resonances, necessitating extensive acoustic treatment.
- Reflection Management
Sound reflections from walls, ceilings, and floors introduce unwanted coloration and reverberation. Strategic placement of absorption panels at first reflection points minimizes these effects, enhancing clarity and stereo imaging. Diffusion panels scatter sound waves, creating a more natural and spacious acoustic environment. Ignoring reflection management can lead to phase cancellation and a muddied sonic image.
- Reverberation Time (RT60)
Reverberation time, the time it takes for sound to decay by 60 dB, significantly impacts the perceived spaciousness and clarity of recordings. An excessively long RT60 can result in a blurred and indistinct sound, while an overly short RT60 can create an unnatural and sterile environment. Control of RT60 is achieved through a combination of absorption, diffusion, and room geometry. A common example is controlling the reverb so there’s no reflections creating a boomy or muddy sounds.
- Noise Isolation
External noise intrusion compromises the integrity of recordings. Effective noise isolation techniques, such as soundproofing walls and sealing air gaps, are essential for maintaining a clean and usable signal. The degree of noise isolation required depends on the surrounding environment, with urban locations demanding more robust solutions. This isolation is used so there are no interferences with your audio tracks.
Addressing these acoustic factors is fundamental to establishing a professional-sounding independently constructed recording environment. Neglecting acoustic treatment compromises the potential of even the highest-quality equipment, hindering the achievement of accurate and impactful recordings.
2. Microphone Selection
In the realm of independently constructed recording environments, microphone selection stands as a critical determinant of sonic quality. Choosing the appropriate microphone ensures accurate capture of sound sources, influencing the overall character and fidelity of the final recording.
- Polar Pattern Considerations
A microphone’s polar pattern defines its sensitivity to sound from different directions. Cardioid microphones, predominantly sensitive to sound from the front, are suitable for isolating individual instruments or vocals, minimizing room ambience. Omnidirectional microphones capture sound equally from all directions, useful for capturing a natural room sound or recording ensembles. Bidirectional (figure-8) microphones are sensitive to sound from the front and rear, rejecting sound from the sides, applicable in stereo recording techniques like the Blumlein Pair. Selection depends on the desired sound and the acoustic properties of the recording space; inappropriate choice can lead to unwanted bleed or an unnatural sound.
- Microphone Type and Sound Source Matching
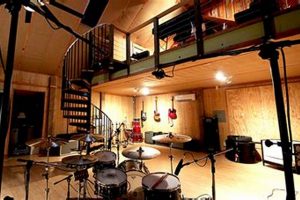
Condenser microphones, characterized by their sensitivity and detailed response, excel in capturing vocals, acoustic instruments, and other nuanced sounds. Dynamic microphones, known for their robustness and ability to handle high sound pressure levels, are often preferred for drums, guitar amplifiers, and other loud sources. Ribbon microphones offer a warm and smooth sound, often used for vocals and brass instruments. Matching the microphone type to the sound source is crucial for achieving optimal results; using a condenser microphone on a loud snare drum, for instance, may result in distortion or damage.
- Frequency Response Characteristics
Each microphone exhibits a unique frequency response curve, influencing the tonal characteristics of the recorded sound. Some microphones have a flat response, accurately capturing the source material, while others have tailored responses, emphasizing certain frequencies. Understanding a microphone’s frequency response is essential for selecting a microphone that complements the sound source. For example, a microphone with a boosted high-frequency response may enhance the clarity of a vocal track, while a microphone with a rolled-off high-frequency response may tame the harshness of a bright instrument.
- Budgetary Constraints and Value Proposition
Independently constructed recording environments often operate within budgetary limitations. While high-end microphones offer superior performance, many affordable options provide excellent value. Researching microphone reviews and comparing specifications allows for informed decision-making. Prioritizing quality over quantity is advisable; investing in a few versatile, well-chosen microphones can yield better results than acquiring numerous subpar options. Investing in a great microphone for guitar instead of a mediocre one, is likely to get you the best result
Careful evaluation of polar patterns, microphone types, frequency response, and budgetary constraints enables informed microphone selection within the context of independently constructed recording environments. Prioritizing these considerations ensures accurate capture of sound sources, contributing to the overall quality and impact of the final recording. Therefore, investing into good microphones is a good idea to make the most out of your project
3. Audio Interface
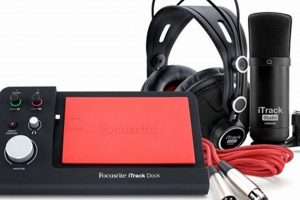
The audio interface serves as a pivotal component within any independently constructed recording environment. Functionally, it acts as the bridge between analog audio signals, such as those from microphones and instruments, and the digital realm of a computer for recording, processing, and playback. The quality and capabilities of the interface directly influence the fidelity and flexibility of the entire recording process. A substandard interface can introduce noise, distortion, and latency, thereby compromising the integrity of the recorded audio. Conversely, a well-designed interface facilitates clean, transparent signal conversion and efficient workflow.
The significance of the audio interface extends beyond simple signal conversion. Modern interfaces often include essential features such as microphone preamplifiers, which boost the low-level signals from microphones to a usable line level. The quality of these preamplifiers is critical for capturing the nuances of sound sources. Many interfaces also offer phantom power for condenser microphones, instrument inputs (DI boxes), headphone outputs for monitoring, and digital connectivity options like ADAT or S/PDIF for expanding input/output capabilities. For example, an interface with high-quality preamps and low latency allows a musician to record vocals with clarity and minimal delay, crucial for performance and monitoring accuracy.
Ultimately, the audio interface represents a core investment in the creation of a functional and professional-sounding home recording setup. Selection should be based on factors such as the number of inputs and outputs required, the quality of preamplifiers and converters, and compatibility with recording software. While budget constraints often influence decisions, prioritizing interface quality is paramount for maximizing the potential of the entire recording environment. Failing to invest in a capable audio interface undermines the benefits of other high-quality equipment, limiting the overall sonic outcome.
4. Monitoring System
A monitoring system within an independently constructed recording environment serves as the critical link between recorded audio and the engineer’s perception, directly influencing mixing decisions and the overall quality of the final product. Accurate and reliable monitoring is essential for making informed judgments about tonal balance, stereo imaging, and dynamic range. A deficient monitoring system can lead to flawed mixes that translate poorly to other playback systems.
- Studio Monitor Selection and Placement
Studio monitors, designed for flat frequency response and accurate sound reproduction, are the primary component of a professional monitoring system. Nearfield monitors, positioned close to the listener, minimize the influence of room acoustics. Proper placement, forming an equilateral triangle with the listening position, ensures accurate stereo imaging and tonal balance. Incorrect monitor selection or placement can result in skewed perceptions of frequency response and inaccurate stereo localization, leading to flawed mixing decisions.
- Headphone Monitoring for Critical Listening
High-quality headphones offer an alternative monitoring solution, particularly useful for critical listening and detailed editing. Closed-back headphones provide isolation from external noise, while open-back headphones offer a more natural and spacious sound. Headphone monitoring allows for precise evaluation of individual tracks and subtle nuances in the mix. Relying solely on headphones, however, can lead to ear fatigue and an overemphasis on detail, potentially resulting in a mix that lacks overall cohesiveness when played back on loudspeakers.
- Room Acoustics and Monitoring Accuracy
The acoustic properties of the recording space significantly impact monitoring accuracy. Untreated rooms introduce unwanted reflections and resonances that distort the perceived sound. Acoustic treatment, including absorption panels, bass traps, and diffusers, minimizes these effects, creating a more neutral and accurate monitoring environment. Ignoring room acoustics can lead to inaccurate mixing decisions, as the perceived sound is colored by the room’s characteristics rather than the true sonic qualities of the recording.
- Calibration and Reference Tracks
Calibrating the monitoring system to a known reference level ensures consistent and accurate playback volume. Using reference tracks, professionally mixed and mastered recordings, provides a benchmark for comparison, allowing engineers to assess the quality and balance of their own mixes. Regular calibration and comparison with reference tracks help maintain consistency and prevent subjective biases from influencing mixing decisions. Not calibrating will lead to uncalibrated monitor and possible sound distortion.
The monitoring system, encompassing studio monitors, headphones, room acoustics, and calibration techniques, is an indispensable element of an independently constructed recording environment. Prioritizing accurate and reliable monitoring empowers engineers to make informed mixing decisions, resulting in professional-sounding recordings that translate effectively across diverse playback systems. As such, a high-quality monitoring system is not merely an accessory, but a fundamental requirement for achieving sonic excellence in a independently constructed recording studio.
5. Software Proficiency
Within an independently constructed recording environment, software proficiency represents a critical determinant of project success. The digital audio workstation (DAW) functions as the central hub for recording, editing, mixing, and mastering audio. Therefore, competence in utilizing such software directly impacts the efficiency and quality of the production workflow.
- DAW Navigation and Workflow Efficiency
Mastery of a DAW’s interface, including track management, routing, and automation, streamlines the recording process. Efficient navigation reduces time spent on technical tasks, allowing greater focus on creative elements. For instance, a proficient user can quickly create complex routing schemes for effects processing, while a novice may struggle with basic track setup, hindering creative flow. This expertise can save hours of studio time and significantly improve the final result.
- Audio Editing and Manipulation Techniques
Skilled audio editing is essential for correcting errors, tightening performances, and shaping the overall sound. Proficiency in techniques like time stretching, pitch correction, and noise reduction enables the refinement of recordings to a professional standard. An example is correcting timing inaccuracies in a drum performance or removing unwanted noise from a vocal track, ensuring a polished and professional product.
- Mixing and Mastering Capabilities
Effective mixing and mastering are crucial for achieving a balanced and polished final product. Understanding concepts such as equalization, compression, and stereo imaging allows for the creation of a sonically cohesive and impactful mix. The ability to apply mastering techniques, such as limiting and dynamic processing, optimizes the final output for various playback platforms, like streaming services and physical media. Incorrect mixing can result in tracks sounding muddy, unbalanced, or unprofessional, regardless of the quality of the initial recording.
- Plugin and Virtual Instrument Utilization
Modern DAWs offer a vast array of plugins and virtual instruments that expand sonic possibilities. Proficiency in utilizing these tools unlocks access to a diverse range of sounds and effects, enabling creative experimentation and sonic innovation. For example, a skilled user can emulate the sound of vintage synthesizers or create complex soundscapes using specialized effects plugins. The incorrect implementation can result to unwanted signal or no sound coming out.
The facets of software proficiency underscore its fundamental role in the independently constructed recording environment. Mastery of these skills empowers creators to translate their creative visions into polished and professional audio productions, irrespective of budget constraints. Investing time in developing software skills is as critical as investing in quality equipment.
6. Cable Management
In an independently constructed recording environment, cable management transcends mere tidiness; it directly impacts workflow efficiency, signal integrity, and overall system reliability. The proliferation of audio interfaces, microphones, instruments, and peripherals within a confined space necessitates a structured approach to cable routing and organization. Unmanaged cables can introduce several detrimental effects. Signal interference, manifesting as unwanted hum or noise, can result from improperly shielded or chaotically arranged cables. Furthermore, tangled cables obstruct access to equipment, impede troubleshooting, and increase the risk of accidental disconnections during critical recording sessions. As a practical example, consider a scenario where a crucial microphone cable becomes inadvertently unplugged mid-take, rendering the recording unusable and wasting valuable studio time. A meticulously managed cable infrastructure mitigates these potential disruptions.
Effective cable management strategies encompass several practical techniques. Implementing color-coded cables simplifies signal tracing and identification, minimizing confusion during setup or modifications. Utilizing cable ties, Velcro straps, or dedicated cable channels secures cables, preventing tangling and reducing strain on connectors. Clear labeling of each cable with its corresponding input or output ensures rapid and accurate connections. In larger setups, incorporating a patch bay allows for flexible signal routing without physically re-cabling equipment, significantly enhancing workflow efficiency. For example, if there are a lot of cables, patch bay is a must for a DIY recording studio, which makes it less difficult to navigate.
Therefore, methodical cable management is not merely an aesthetic consideration but a functional imperative within an independently constructed recording environment. The implementation of structured cable routing, labeling, and securing techniques improves system reliability, reduces signal interference, and enhances workflow efficiency. Consequently, careful attention to cable management contributes significantly to the creation of professional-quality recordings and the overall productivity of the home recording studio.
Frequently Asked Questions
This section addresses common inquiries and misconceptions regarding the establishment and operation of independently constructed recording environments. The information provided aims to clarify key considerations and dispel potential ambiguities.
Question 1: What is the minimum essential equipment required to establish a functional independently constructed recording environment?
A functional setup necessitates, at a minimum, a computer equipped with digital audio workstation (DAW) software, an audio interface with microphone preamplifiers, a microphone appropriate for the intended sound source, studio monitors or headphones for accurate monitoring, and essential cabling. Acoustic treatment, although not strictly essential at the outset, significantly impacts sound quality and is highly recommended.
Question 2: How critical is acoustic treatment in a small, independently constructed recording environment?
Acoustic treatment is highly critical. Small rooms exhibit pronounced modal resonances and reflections, leading to inaccurate monitoring and compromised recording quality. Implementing even basic acoustic treatment measures, such as absorption panels at first reflection points, yields substantial improvements in sonic clarity and accuracy.
Question 3: Can consumer-grade headphones substitute for studio monitors in a recording environment?
While consumer-grade headphones can be used for initial monitoring or casual listening, studio monitors provide a more accurate and balanced frequency response essential for critical mixing decisions. Consumer headphones often exhibit a colored sound signature that can lead to inaccurate perceptions of tonal balance.
Question 4: What are the key considerations when selecting an audio interface for a independently constructed recording environment?
Key considerations include the number of inputs and outputs required, the quality of microphone preamplifiers, the bit depth and sample rate capabilities, and compatibility with the chosen DAW software. Latency performance is also crucial for real-time monitoring and recording.
Question 5: Is it necessary to invest in expensive microphones to achieve professional-sounding recordings?
While high-end microphones offer superior performance, many affordable options provide excellent value. The choice depends on the specific application and budget. Proper microphone technique, careful placement, and a well-treated recording space often contribute more significantly to the final sound than simply using an expensive microphone.
Question 6: How important is software proficiency in a independently constructed recording environment?
Software proficiency is paramount. The DAW is the central hub for all recording, editing, mixing, and mastering tasks. Mastery of the DAW’s features and functions significantly impacts workflow efficiency, creative possibilities, and the overall quality of the final product.
In summary, establishing a functional independently constructed recording environment necessitates a holistic approach, encompassing careful equipment selection, acoustic treatment, and software proficiency. Addressing these factors is paramount for achieving professional-quality recordings within a limited budget and space.
The next section will explore advanced techniques and strategies for optimizing a independently constructed recording environment.
diy recording studio
This exploration of the DIY recording studio reveals its complexities, extending beyond mere equipment acquisition. Success hinges on understanding acoustics, microphone technology, audio interfaces, monitoring systems, and software operation. Strategic implementation of these elements is paramount for achieving professional-quality audio within limited budgets and spaces. Ignoring any facet compromises the potential of the entire setup.
The ability to create high-fidelity recordings independently empowers creators and democratizes audio production. Continuous learning and adaptation to emerging technologies remain critical for sustained success in this evolving landscape. Consequently, dedication to mastering both technical and artistic aspects is essential for maximizing the potential of the DIY recording studio and contributing meaningfully to the broader audio production community.


![Best Recording Home Studio Desk [Setup Guide] Study Travel Abroad | Explore Educational Trips & Global Learning Opportunities Best Recording Home Studio Desk [Setup Guide] | Study Travel Abroad | Explore Educational Trips & Global Learning Opportunities](https://studyhardtravelsmart.com/wp-content/uploads/2025/12/th-552-300x200.jpg)


