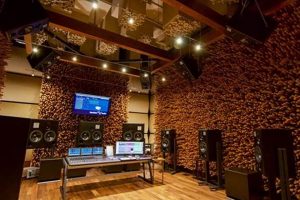
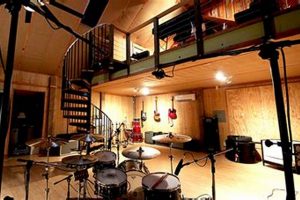
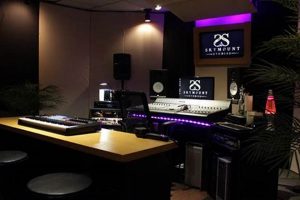
The process of creating a dedicated space within a residence optimized for audio recording and production is an endeavor focused on acoustic treatment, equipment selection, and spatial arrangement. As an illustration, consider a spare bedroom transformed into a sound-treated environment, complete with recording console, microphones, and monitoring systems.
Such spatial configuration yields significant benefits. A tailored recording environment offers enhanced sound quality by minimizing unwanted reflections and external noise interference. Historically, dedicated recording facilities were expensive and inaccessible to many. The feasibility of constructing a personal production space has democratized the audio creation process, empowering individuals to create professional-quality recordings within their own residences. This accessibility fosters artistic exploration and creative control.
Therefore, subsequent sections will delve into critical considerations for spatial acoustics, effective soundproofing techniques, essential equipment requirements, and optimal workflow configurations within the personalized recording environment.
Design Considerations for a Residential Recording Space
The following guidelines offer practical advice for optimizing a residential space for audio recording purposes. Attention to these details can significantly improve the quality and usability of the resulting studio.
Tip 1: Acoustic Treatment is Paramount: Employ acoustic panels, bass traps, and diffusers strategically throughout the room. These elements mitigate unwanted reflections, standing waves, and flutter echoes, contributing to a cleaner and more accurate sound.
Tip 2: Prioritize Sound Isolation: Implement measures to reduce sound transmission into and out of the room. This might involve sealing gaps around doors and windows, using dense materials for walls and floors, and considering double-wall construction in extreme cases.
Tip 3: Optimize Equipment Placement: Position monitors according to the “golden triangle” principle for accurate stereo imaging. Locate the recording console within easy reach of essential equipment and instruments. Cable management is essential for a clutter-free workflow.
Tip 4: Consider Power and Electrical Grounding: Dedicate a separate electrical circuit for the recording equipment to minimize noise and interference. Ensure proper grounding to prevent hum and other electrical anomalies.
Tip 5: Optimize Room Dimensions: Rectangular rooms with parallel surfaces can create unwanted resonances. Attempt to mitigate this by using non-parallel acoustic treatments, or by designing the space to minimize parallel wall surfaces.
Tip 6: Ergonomics Matter: Invest in a comfortable and adjustable chair. Organize the workspace to minimize strain and fatigue during extended recording sessions. Proper lighting is essential for maintaining focus and clarity.
By implementing these considerations, a residential space can be transformed into a functional and effective recording environment.
The subsequent section will explore the selection of essential equipment required to transform the space in a functional recording studio.
1. Acoustic Treatment
Acoustic treatment is an indispensable element within the broader context of constructing a functional sound workspace. It directly influences the accuracy and clarity of recorded audio. Untreated or poorly treated rooms introduce unwanted sonic artifacts, such as reverberation, standing waves, and comb filtering, which distort the perceived sound and degrade the quality of recordings. In a live music recording scenario, excessive reverberation might obscure the individual instrument’s detail in sound. In home recording environment, a noticeable standing waves at some frequencies can ruin the tone.
Effective acoustic treatment aims to mitigate these issues through the strategic placement of specialized materials designed to absorb, diffuse, or reflect sound waves. Absorption reduces reverberation time by converting sound energy into heat, typically through porous materials like acoustic foam or fiberglass panels. Diffusion scatters sound waves, preventing strong reflections and creating a more even distribution of sound energy throughout the room. Reflection, while often minimized, can be strategically employed to enhance the perceived spaciousness of a recording. The choice and placement of these materials directly impact the sonic characteristics of the space. Examples include installing bass traps in corners to address low-frequency standing waves and utilizing broadband absorbers on walls to control mid and high-frequency reflections.
Without adequate acoustic treatment, even high-quality recording equipment yields subpar results. The process of acoustic treatment is, in essence, shaping the sound of the space to align with the intended purpose of recording or mixing audio. A well-designed system enables accurate monitoring, facilitates critical listening, and ultimately contributes to the creation of professional-quality recordings. In conclusion, acoustic treatment is a foundational aspect of the home recording studio, and must be addressed for the best performance.
2. Sound Isolation
Sound isolation, within the context of residential recording environments, constitutes a critical element in the design and construction of a functional space. Its primary function is to minimize the transmission of sound energy, both into and out of the designated recording area. Inadequate sound isolation leads to several detrimental effects. External noise pollution, such as traffic, domestic appliances, or neighboring activities, can contaminate recordings, rendering them unusable or requiring extensive post-production remediation. Conversely, sound leakage from the studio can disturb occupants of the residence or adjacent properties, creating noise complaints and limiting recording flexibility. The effectiveness of sound isolation directly impacts the usability and professional credibility of the studio. Consider, for example, a voice-over recording being ruined by the sound of a lawnmower outside or a drum track being interrupted by a barking dog. The need to avoid these interference is a must, hence the importance of sound isolation.
Effective sound isolation employs a multi-faceted approach involving various construction techniques and materials. Common strategies include sealing gaps around doors and windows with weather stripping and acoustic sealant, utilizing dense materials like mass-loaded vinyl or multiple layers of drywall in wall construction, and implementing decoupled wall and ceiling assemblies to minimize vibration transmission. Additionally, strategically placed acoustic doors and windows can significantly reduce sound leakage. The practical application of these techniques demands careful planning and execution. A poorly sealed window or a thin, uninsulated wall can negate the effectiveness of other sound isolation measures. The implementation of sound isolation is not only about stopping sound transmission from outside, but to improve sound quality recording in the studio. Minimizing echo and reverberations helps with the tone and frequency response.
In summary, sound isolation is an essential component in residential recording area construction because it’s essential for producing professional quality audio with minimum sound interference and sound leakages. The cost of building material or construction labor is well worth it, as it impacts the usable hours and sound quality from any recording. Addressing this early in the planning process is vital for achieving a functional and professional-sounding recording facility.
3. Equipment Placement
The arrangement of equipment within a home recording studio significantly impacts workflow, acoustics, and overall usability. Thoughtful placement optimizes the recording process, minimizes unwanted noise and reflections, and contributes to a more comfortable and efficient workspace. Precise configuration elevates the home recording area from an amateur arrangement to a professional recording facility.
- Monitor Positioning and Acoustic Accuracy
Nearfield monitors are typically placed to form an equilateral triangle with the listening position. This configuration, often referred to as the “golden triangle,” helps ensure accurate stereo imaging and frequency response at the mixing position. Deviation from this placement can lead to inaccurate sound perception and flawed mixing decisions. For example, improperly positioned monitors can result in exaggerated bass frequencies or a skewed stereo image, requiring corrective measures that may introduce unintended artifacts.
- Microphone Placement and Source Capture
Microphone placement is pivotal in capturing the desired sonic characteristics of a sound source. The proximity effect, polar pattern, and angle of incidence all influence the recorded sound. Positioning a microphone too close to a sound source can result in exaggerated bass frequencies and distortion, while placing it too far away can introduce unwanted room ambience and noise. In the setting, proper consideration of these factors ensures optimal sound source capture, minimizing the need for extensive equalization and processing during mixing.
- Console and Interface Ergonomics
The placement of the recording console or audio interface should prioritize ergonomic considerations and workflow efficiency. It must be located within easy reach of the listening position, near monitors, and provide sufficient space for operating controls and connecting peripherals. An inefficiently placed console can lead to physical strain and disrupt the creative process, hindering productivity. This layout allows for comfortable extended usage.
- Instrument and Amplifier Arrangement
The positioning of instruments and amplifiers directly affects the sound captured by microphones. Placing amplifiers near walls can amplify bass frequencies and create unwanted reflections, while placing instruments in acoustically dead zones can result in a dull and lifeless sound. Therefore, strategic arrangement is crucial for optimizing the recording of these devices. The ideal placements can mitigate these problems.
These considerations regarding equipment positioning are integral to achieving a professional sound. The proper organization not only enhances the sound, but also contributes to an effective, comfortable, and productive studio for recording. Prioritizing layout is a fundamental element of audio recording.
4. Power Configuration
The design of a home recording studio fundamentally relies on a stable, clean, and properly configured power supply. Inadequate power configuration introduces a cascade of problems, ranging from audible noise in recordings to equipment malfunction and potential data loss. The connection between electrical supply and audio signal integrity is direct and demonstrably critical. Ground loops, voltage fluctuations, and electromagnetic interference (EMI) directly impact the fidelity of recorded audio. For instance, a poorly grounded amplifier can introduce a persistent hum in recordings, demanding time-consuming and often imperfect post-production remediation. Insufficient power capacity can cause digital audio workstations (DAWs) to crash during demanding sessions, resulting in the loss of valuable creative work. Therefore, proper power configuration transcends mere convenience; it’s a foundational element underpinning the operational stability and sonic quality of the studio.
Practical implementation of optimized power configuration involves several key steps. First, dedicating a separate electrical circuit specifically for the recording equipment minimizes the likelihood of interference from other household appliances. The use of surge protectors and uninterruptible power supplies (UPS) safeguards against power surges and outages, protecting sensitive electronic components and preventing data loss. Furthermore, employing power conditioners or balanced power transformers helps filter out unwanted noise and stabilize voltage levels, resulting in a cleaner audio signal. The grounding scheme must be meticulously implemented to prevent ground loops, often achieved through star grounding or the use of ground lift adapters (with caution). Ignoring these factors can lead to a costly and time-consuming troubleshooting process, detracting from the creative workflow. Careful planning of a home recording layout is necessary to have sufficient outlet in the area.
In conclusion, power configuration constitutes a non-negotiable aspect in the construction of a home recording studio. Neglecting it compromises the integrity of recorded audio, jeopardizes equipment lifespan, and disrupts the creative workflow. Addressing these concerns requires a proactive approach encompassing dedicated circuits, surge protection, power conditioning, and meticulous grounding. While potentially overlooked in initial planning stages, proper power management is an investment that directly translates into professional-quality recordings and a reliable studio environment. The investment to proper power and electrical safety is essential to ensure safe usage.
5. Room Dimensions
The physical dimensions of a recording space exert a substantial influence on its acoustic properties, directly impacting the accuracy and quality of recorded and monitored audio. Optimizing a room’s dimensions is paramount in mitigating undesirable acoustic phenomena and creating a suitable environment for critical listening and audio production.
- Modal Resonances and Standing Waves
Room dimensions dictate the frequencies at which modal resonances, also known as standing waves, occur. Parallel surfaces within a room create predictable patterns of constructive and destructive interference, resulting in peaks and nulls in the frequency response. These resonances disproportionately amplify certain frequencies while attenuating others, leading to an inaccurate perception of the audio signal. For example, a small room with parallel walls may exhibit prominent standing waves in the low-frequency range, resulting in a boomy and undefined bass response. The dimensions need to be adequate to spread the sound range.
- Axial, Tangential, and Oblique Modes
Room modes are categorized as axial, tangential, and oblique, each reflecting the interaction of sound waves along different room dimensions. Axial modes, occurring between two parallel surfaces, are the most prominent and easily calculated. Tangential and oblique modes, involving more complex wave paths, contribute to the overall modal response but are typically less intense. Understanding the distribution and frequency of these modes is crucial for effective acoustic treatment. For instance, strategically placed bass traps in corners and along walls can mitigate the impact of axial modes, improving the clarity and definition of low-frequency audio.
- Golden Ratio and Room Proportions
The concept of the “golden ratio” is often applied in acoustics to determine optimal room proportions. Rooms designed according to these proportions (e.g., 1:1.14:1.39) tend to exhibit a more even distribution of modal frequencies, minimizing the severity of individual resonances. While achieving ideal proportions is not always feasible in existing spaces, careful consideration of room ratios during the design phase can significantly improve acoustic performance. Deviations from ideal proportions may necessitate more extensive acoustic treatment to achieve a balanced frequency response.
- Small Room Acoustics and Psychoacoustic Effects
In smaller rooms, the density of modal frequencies increases, making acoustic treatment more challenging. The close proximity of reflective surfaces also amplifies psychoacoustic effects, such as comb filtering and flutter echoes, which can further distort the perceived sound. Careful placement of acoustic panels, diffusers, and bass traps is essential in managing these effects and creating a more neutral and controlled listening environment. Furthermore, optimizing the listening position within the room can minimize the impact of detrimental acoustic phenomena.
The aforementioned considerations underscore the crucial role of room dimensions in home recording area. Selecting appropriately sized and proportioned rooms, coupled with strategic acoustic treatment, is essential for achieving accurate and reliable monitoring and recording capabilities. Failing to address these aspects can severely compromise the quality and usability of the studio space. Therefore, it requires careful evaluation.
6. Ergonomic Considerations
In the context of home recording studio design, ergonomic considerations play a crucial role in promoting comfort, preventing physical strain, and enhancing productivity. The integration of ergonomic principles directly impacts the long-term health and well-being of individuals who spend extended periods creating and manipulating audio. Neglecting these principles can lead to musculoskeletal disorders, reduced efficiency, and diminished creative output.
- Seating and Posture
Prolonged sitting is inherent in the recording and mixing process. An adjustable chair with adequate lumbar support is essential for maintaining proper posture and minimizing back strain. The height of the chair should allow for a neutral wrist position when operating the recording console or keyboard. For example, using a chair that forces a user to hunch over the equipment leads to lower back pain, reducing focus and energy levels. A high-quality ergonomic chair, on the other hand, supports the spine and promotes proper circulation, enabling longer and more productive sessions.
- Monitor Placement and Visual Comfort
The positioning of computer monitors and audio monitors directly affects visual comfort and neck strain. Monitors should be placed at eye level and within comfortable viewing distance to minimize neck flexion and eye fatigue. The angle and distance should take into consideration the display size, so users do not have to strain to view the output. Proper lighting should also be employed to minimize glare and eye strain. Inadequate monitor placement contributes to headaches, blurred vision, and decreased concentration.
- Keyboard and Mouse Ergonomics
The placement and selection of keyboards and mice influence wrist and arm comfort. A keyboard tray that allows for adjustable height and tilt promotes a neutral wrist position. Ergonomic mice, designed to fit the natural contours of the hand, reduce strain on the wrist and forearm muscles. Using a standard keyboard directly on a desk surface forces users to bend their wrists at unnatural angles, increasing the risk of carpal tunnel syndrome. A split keyboard and wrist rest encourage relaxed hand positions, decreasing the potential for repetitive strain injuries.
- Workspace Organization and Accessibility
A well-organized workspace minimizes unnecessary reaching, stretching, and twisting. Frequently used equipment and controls should be positioned within easy reach, reducing physical exertion and promoting efficiency. Cable management solutions prevent clutter and tripping hazards. A chaotic workspace increases stress levels and impairs workflow, while a streamlined and organized environment fosters creativity and productivity. Efficient cable management also reduces trip hazards, creating a safe environment.
These integrated considerations collectively contribute to a more sustainable and productive recording environment. Prioritizing ergonomic principles is not merely about comfort; it is a strategic investment that safeguards the health and well-being of audio professionals and enthusiasts, ultimately enhancing the quality and longevity of their creative endeavors within the home recording studio.
7. Workflow Optimization
Workflow optimization, in the context of residential recording space, pertains to the strategic arrangement and implementation of procedures that streamline the creative and technical processes involved in audio production. Efficient workflow directly affects project completion rates, creative momentum, and overall enjoyment of the recording process. Therefore, integrating considerations into the configuration maximizes the usability of the recording area.
- Equipment Accessibility and Arrangement
The physical accessibility of recording equipment significantly impacts workflow efficiency. Essential tools, such as microphones, interfaces, and control surfaces, should be located within immediate reach of the operator. Instruments should be positioned to facilitate quick transitions between recording tasks. As an example, an engineer recording both vocals and guitar might position a microphone stand and guitar amplifier within arm’s reach of the mixing console, eliminating unnecessary delays and disruptions. This arrangement reduces wasted time and maintains creative momentum.
- Digital Audio Workstation (DAW) Template Design
The creation of customized DAW templates tailored to specific recording tasks streamlines the initial setup process. Pre-configured templates can include commonly used tracks, routing configurations, and plugin settings, reducing the time spent on repetitive tasks. As an example, a template designed for recording drums might include pre-configured tracks for each drum microphone, along with appropriate routing and initial gain settings. This eliminates the need to configure each track manually, allowing the engineer to focus on capturing the performance. It helps maintain focus on the recording process, rather than technical implementation.
- Signal Flow Management and Patchbay Implementation
A well-defined signal flow and strategic implementation of patchbays can significantly improve the flexibility and efficiency of the routing process. Patchbays allow for the quick and easy re-routing of audio signals without the need to physically re-connect cables. For example, an engineer might use a patchbay to quickly route a microphone signal to different preamplifiers or effects processors, enabling them to experiment with different sound combinations without interrupting the recording process. This flexibility promotes creativity and expedites the sound design process.
- Preset Management and Recall Systems
The use of preset management systems for plugins, effects processors, and other audio tools streamlines the recall of preferred settings and configurations. Storing and organizing commonly used presets allows for the quick and consistent application of desired sonic characteristics. As an example, an engineer might create a library of vocal processing presets tailored to different singers or genres, enabling them to quickly recall preferred settings for specific recording sessions. This reduces the time spent tweaking parameters and promotes consistency across projects.
The aspects discussed directly contribute to the overall functionality and efficiency of a personal recording studio. By strategically optimizing workflow, audio professionals and enthusiasts can minimize distractions, maximize productivity, and enhance the creative process. The integration of these principles transforms a personal studio into a streamlined and effective workspace.
Frequently Asked Questions About Studio Creation
The following addresses common inquiries concerning the establishment of a residential space suitable for professional-quality audio recording. These address practical considerations for achieving optimal results.
Question 1: What constitutes the most critical element when establishing a residential recording space?
Acoustic treatment is often regarded as the most critical element. Untreated rooms exhibit undesirable reflections and resonances, negatively affecting the accuracy of recordings and mixes. Strategic placement of absorption, diffusion, and bass trapping materials is paramount.
Question 2: Is complete soundproofing achievable, and what are realistic expectations for noise reduction?
Achieving complete sound isolation in a residential setting is often impractical due to structural limitations and budgetary constraints. However, significant noise reduction can be achieved through careful sealing of gaps, dense wall construction, and decoupled framing techniques. Manage expectations according to architectural design.
Question 3: How important are room dimensions, and what strategies mitigate the effects of unfavorable dimensions?
Room dimensions significantly influence acoustic behavior, particularly low-frequency response. While ideal room ratios are beneficial, they are not always achievable. Bass traps, strategically positioned absorption, and careful speaker placement mitigate the effects of suboptimal dimensions.
Question 4: What electrical considerations merit particular attention?
A dedicated electrical circuit for recording equipment is highly recommended to minimize noise and interference. Surge protection is essential to safeguard sensitive electronic components. Proper grounding prevents ground loops and reduces hum. The importance of electrical safety must be considered.
Question 5: How does equipment placement contribute to the recording and mixing process?
Monitor placement according to the “golden triangle” principle optimizes stereo imaging and frequency response. Microphone placement directly impacts the captured sound, necessitating careful consideration of proximity effect and polar patterns. Ergonomic placement of consoles and interfaces promotes comfort and efficiency.
Question 6: What are the key ergonomic factors to consider for prolonged studio work?
An adjustable chair with lumbar support is essential for maintaining proper posture. Monitor placement at eye level reduces neck strain. A well-organized workspace minimizes unnecessary reaching and promotes efficient workflow. Proper posture can drastically improve long recording sessions.
The above points highlight essential considerations in residential studio design. Addressing these factors contributes significantly to the creation of a functional and acoustically sound recording environment.
The subsequent section will focus on budget considerations for setting up a recording studio.
Home Recording Studio Design
The preceding exploration of home recording studio design highlights its multifaceted nature. Acoustic treatment, sound isolation, equipment placement, power configuration, room dimensions, ergonomic considerations, and workflow optimization each contribute to the creation of a functional and professional environment. Mastering these components improves the recording capabilities of the studio.
Recognizing the interplay of these aspects empowers informed decision-making in studio creation. The establishment of effective spaces transcends mere equipment acquisition; it requires a holistic understanding of acoustics, ergonomics, and workflow. Continued refinement of these parameters facilitates ongoing artistic expression and sonic quality enhancement.


![Best Recording Home Studio Desk [Setup Guide] Study Travel Abroad | Explore Educational Trips & Global Learning Opportunities Best Recording Home Studio Desk [Setup Guide] | Study Travel Abroad | Explore Educational Trips & Global Learning Opportunities](https://studyhardtravelsmart.com/wp-content/uploads/2025/12/th-552-300x200.jpg)


