Creating a dedicated space for sound recording and production within a residential environment involves careful planning and execution. This process encompasses selecting a suitable room, implementing acoustic treatments, acquiring necessary equipment, and configuring the workspace for optimal workflow. The goal is to establish an environment conducive to capturing and manipulating audio signals with professional quality.
The impetus to establish a personal sound production space stems from various factors, including the increasing accessibility of high-quality recording equipment at reasonable prices and the desire for greater creative control over the recording process. Historically, professional recording studios were the only option for achieving quality sound. However, technological advancements have democratized audio production, enabling individuals to create professional-sounding recordings from their homes.
The subsequent sections will delve into the critical aspects of setting up such a space, from initial acoustic considerations and equipment selection to software choices and workflow optimization. Careful attention to these elements can transform a spare room into a powerful creative tool.
Essential Considerations
The successful establishment of a residential sound recording environment hinges on meticulous planning and execution. Several critical factors merit careful consideration prior to undertaking any physical modifications or equipment acquisitions.
Tip 1: Room Selection: Choose a room that is inherently less prone to undesirable acoustic characteristics. Rectangular rooms with dimensions that are not multiples of each other are generally preferable, as they distribute standing waves more evenly. Evaluate existing noise levels and consider isolation strategies if external sounds are problematic.
Tip 2: Acoustic Treatment Planning: Acoustic treatment is paramount. Prioritize addressing low-frequency problems with bass traps in corners. Subsequently, implement absorption panels at first reflection points to minimize unwanted reflections that can smear the stereo image. Diffusion can then be strategically added to maintain a natural sound within the space.
Tip 3: Equipment Prioritization: Focus initially on acquiring essential equipment that provides the greatest return on investment. This typically includes a high-quality audio interface, a versatile microphone suitable for the intended recording applications, and studio monitors with an accurate frequency response. Additional equipment can be added as needs and budget allow.
Tip 4: Cable Management: Implement a robust cable management system from the outset. This not only enhances the aesthetic appeal of the workspace but also minimizes the risk of signal interference and facilitates efficient troubleshooting. Utilize cable ties, conduits, and clearly labeled connections to maintain a tidy and organized environment.
Tip 5: Power Conditioning: Invest in a power conditioner to protect sensitive audio equipment from voltage fluctuations and electrical noise. Clean power is essential for achieving optimal audio quality and extending the lifespan of electronic components.
Tip 6: Monitor Placement: Precise monitor placement is crucial for accurate mixing decisions. Adhere to the equilateral triangle principle, ensuring that the distance between the monitors and the listening position is equal to the distance between the monitors themselves. Experiment with toe-in angles to optimize the stereo image and minimize unwanted reflections.
Implementing these considerations will contribute significantly to the creation of a functional and acoustically sound recording environment, ultimately enhancing the quality of audio productions.
The following sections will explore specific equipment choices and software options to further refine the residential sound recording setup.
1. Acoustic Treatment
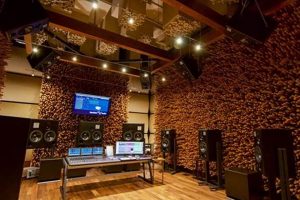
Acoustic treatment is fundamentally linked to creating a functional residential recording space. The raw acoustics of a typical room are often unsuitable for critical listening and recording. Untreated rooms exhibit undesirable characteristics such as excessive reverberation, standing waves, and flutter echoes. These acoustic anomalies introduce inaccuracies into recorded material and impede the ability to make informed mixing decisions. Therefore, the absence of adequate acoustic treatment diminishes the utility of any investment in high-quality recording equipment.
Effective acoustic treatment addresses these issues through strategic placement of absorptive and diffusive materials. Absorption reduces unwanted reflections, shortening reverberation time and creating a more controlled listening environment. Bass traps, a type of absorption, target low-frequency standing waves that accumulate in corners. Diffusers scatter sound waves, preventing flutter echoes and maintaining a sense of spaciousness without excessive reflections. For instance, placing absorption panels at first reflection points locations where sound from the monitors initially reflects off surfaces to the listener significantly improves stereo imaging and clarity. Without such treatment, mixing decisions made in the residential space are unlikely to translate accurately to other playback systems.
In summary, acoustic treatment is not merely an optional add-on, but an integral and essential component. The sound quality resulting from work completed in a residential recording setting is directly and significantly affected by the care and attention given to proper acoustic design. This necessitates a focused investment in understanding and implementing suitable acoustic solutions, allowing the recording space to function as a tool that enhances, rather than hinders, the creative process.
2. Equipment Selection
The selection of audio equipment is a deterministic factor in the overall success of constructing a residential sound recording facility. This process necessitates a thorough understanding of the intended use of the studio and a careful evaluation of the available options. The equipment directly impacts the quality of the recordings, the efficiency of the workflow, and the ultimate creative potential of the space. For example, a studio primarily intended for vocal recording requires a high-quality microphone with appropriate polar patterns and a preamplifier designed to provide clean gain and minimal noise. Conversely, a studio focused on electronic music production may prioritize synthesizers, drum machines, and MIDI controllers. The choice of equipment dictates the sonic possibilities achievable within the studio environment.
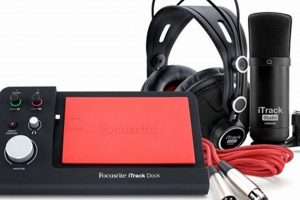
The interdependence between equipment selection and the overall functionality of the studio also extends to ancillary components. The audio interface serves as the central hub for signal routing and conversion, influencing the latency and dynamic range of recordings. Studio monitors provide the crucial link between the digital audio workstation and the engineer’s ears, impacting mixing decisions and the final sonic balance. The selection of headphones, cables, and other peripherals contributes to the overall signal path and the reduction of noise and interference. A poorly chosen cable, for instance, can introduce unwanted hum or reduce signal fidelity, negating the benefits of more expensive microphones or preamplifiers. The cohesive integration of all equipment elements is critical to a well-functioning studio.
Ultimately, the strategic acquisition of audio equipment directly determines the capabilities and limitations of a residential recording space. A thoughtful and informed approach to equipment selection, grounded in a clear understanding of the intended applications, ensures the creation of a functional and inspiring creative environment. It ensures that investments in studio construction yield tangible improvements in the quality and efficiency of audio production. Conversely, a poorly planned equipment acquisition can lead to workflow bottlenecks, compromised sonic integrity, and unfulfilled creative potential. The equipment is more than just the physical components of the studio; it is a collection of tools that profoundly shape the creative process.
3. Software Proficiency
Within the context of establishing a residential recording environment, software proficiency represents a critical determinant of operational efficacy and creative output. The digital audio workstation (DAW) serves as the central nexus for recording, editing, mixing, and mastering audio signals. Competence in utilizing this software is, therefore, paramount to maximizing the studio’s potential.
- DAW Navigation and Configuration
The fundamental ability to navigate the DAW interface, configure audio inputs and outputs, manage plugin settings, and establish routing schemes is essential. Without this base-level proficiency, even the most sophisticated recording equipment remains largely unusable. For instance, failing to properly configure buffer settings can introduce latency issues that hinder real-time recording and monitoring. Similarly, an inability to manage plugin paths can prevent access to essential mixing tools. This aspect forms the bedrock of effective software utilization.
- Audio Editing and Manipulation
DAWs offer a comprehensive suite of tools for manipulating audio waveforms. Proficiency in tasks such as cutting, trimming, time-stretching, pitch-shifting, and noise reduction is critical for refining recordings and correcting errors. An example of this is the ability to surgically remove unwanted noises from a vocal track or precisely align drum hits to improve rhythmic tightness. Mastering these techniques elevates the quality and professionalism of the final product.
- Mixing and Mastering Techniques
The mixing and mastering stages represent the culmination of the audio production process. Proficiency in this domain requires a deep understanding of equalization, compression, reverb, delay, and other effects. Knowing how to sculpt the sonic landscape, balance individual tracks, and create a cohesive mix is indispensable. Furthermore, familiarity with mastering techniques, such as limiting and stereo enhancement, is essential for preparing audio for distribution. This stage significantly refines and polishes the final product.
- Plugin Management and Utilization
Plugins extend the capabilities of the DAW, offering a vast array of processing options. From virtual instruments and synthesizers to specialized effects processors, plugins are an integral part of modern audio production. Proficiency in plugin management involves understanding how to install, organize, and utilize these tools effectively. The ability to select the appropriate plugin for a specific task and to dial in the desired settings is crucial for achieving a professional sound. For example, using a convolution reverb plugin to emulate the acoustic characteristics of a specific space or employing a dynamic EQ to address frequency imbalances in a vocal track.
These elements of software proficiency are not isolated skills but rather interconnected facets of a holistic understanding. Mastering these facets significantly enhances the capacity to harness the full potential of a residential recording space. The degree of skill directly influences the quality of the output and the efficiency of the workflow, ultimately determining the creative boundaries of the studio. The commitment to gaining proficiency in software usage is, therefore, an investment that directly yields tangible improvements in the calibre of the audio recordings produced.
4. Workflow Optimization
Workflow optimization, within the context of establishing a residential recording facility, represents a systematic approach to streamlining the creative and technical processes involved in audio production. Its significance lies in maximizing efficiency, minimizing distractions, and fostering an environment conducive to consistent and high-quality output. A well-optimized workflow allows for greater focus on artistic expression rather than technical hurdles.
- Ergonomic Workspace Design
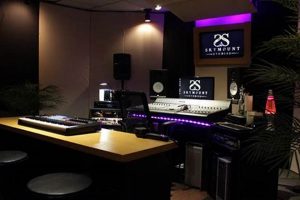
The physical layout of the studio significantly impacts workflow. Positioning equipment within easy reach, ensuring comfortable seating, and minimizing clutter are crucial. For example, a MIDI keyboard placed too far from the DAW controller may disrupt the creative flow, necessitating unnecessary physical movement. A well-designed workspace promotes fluid interaction with equipment, reducing physical strain and cognitive load.
- Template Creation and Standardization
Establishing standardized project templates within the DAW streamlines the initial stages of production. These templates can include pre-configured routing schemes, commonly used plugins, and default track settings. For instance, a vocal recording template might include a pre-assigned microphone input, a dedicated reverb bus, and a compressor plugin pre-loaded on the vocal track. This eliminates repetitive setup tasks, allowing for immediate focus on capturing audio.
- Keyboard Shortcuts and Macros
Utilizing keyboard shortcuts and macros accelerates common tasks within the DAW. Memorizing frequently used shortcuts, such as copy, paste, and undo, reduces reliance on mouse navigation. Creating custom macros for complex operations, such as bouncing a track to disk or applying a specific plugin chain, can further expedite the workflow. The efficient execution of tasks results in more focused creative time.
- Effective File Management and Organization
Maintaining a well-organized file management system is crucial for efficient project retrieval and collaboration. Establishing clear naming conventions for audio files, project folders, and plugin presets prevents confusion and reduces the time spent searching for assets. For example, using a consistent naming structure such as “ProjectName_TrackType_VersionNumber” facilitates easy identification and retrieval of specific files. A clearly defined system minimizes wasted time and promotes efficient project management.
These facets of workflow optimization collectively contribute to a more streamlined and productive residential recording environment. By addressing these elements, individuals are able to maximize creative potential, minimize technical distractions, and consistently produce high-quality audio recordings. The dedication to workflow optimization is therefore an investment that directly contributes to the overall success and efficacy of the residential studio.
5. Sound Isolation
Sound isolation is a critical consideration in the design and construction of a residential audio recording facility. Its primary function is to minimize the transmission of sound both into and out of the recording space. Inadequate sound isolation compromises recording quality and disrupts the surrounding environment, rendering the studio less effective and potentially impacting relationships with neighbors or family members.
- Airborne Sound Isolation
Airborne sound isolation addresses the transmission of sound waves through the air. Effective strategies include sealing gaps around doors and windows, using dense building materials, and constructing double-wall or staggered-stud wall assemblies. An example is upgrading a standard hollow-core door to a solid-core door with tight-fitting seals. This significantly reduces the amount of external noise entering the studio, allowing for cleaner recordings. Conversely, it prevents loud musical performances from disturbing others in the residence.
- Structure-Borne Sound Isolation
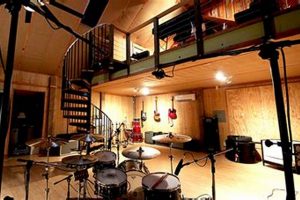
Structure-borne sound isolation focuses on minimizing the transmission of vibrations through the building’s structure. Techniques include resilient channels, floating floors, and vibration isolation mounts for equipment. For instance, a drum set placed directly on a wood-framed floor transmits significant vibrations throughout the building. Employing a floating floor, constructed with resilient isolation mounts, reduces this transmission, mitigating disturbances in adjacent rooms.
- Decoupling Techniques
Decoupling involves physically separating the studio’s structure from the surrounding building. This prevents sound from traveling through connected surfaces. Examples include building a “room within a room” or using specialized clips to isolate drywall from studs. A room within a room literally decouples the walls, ceiling, and floor of the new space from the existing home, making it far less prone to transmit sound.
- Material Selection
The choice of building materials significantly influences sound isolation. Dense materials, such as concrete and mass-loaded vinyl, provide greater resistance to sound transmission than lighter materials. For example, adding a layer of mass-loaded vinyl to existing walls increases their mass and reduces sound transmission. These changes are useful because they are minimally invasive, but can still dramatically improve isolation.
The implementation of comprehensive sound isolation measures is an investment that yields substantial returns in the functionality and usability of a residential sound recording studio. These measures enable the capture of clean, unpolluted audio signals and provide a controlled, distraction-free creative environment, which is paramount to high quality work. The effectiveness of a studio is directly correlated to the degree of sound isolation achieved, underscoring its importance in the overall design and construction process.
Frequently Asked Questions
The following questions address common concerns and misconceptions encountered when constructing a residential recording space.
Question 1: What is the single most crucial element in establishing a functional residential recording space?
Acoustic treatment. While high-quality equipment is essential, the sonic characteristics of an untreated room will negatively impact recording accuracy and mixing decisions, diminishing the value of equipment investments.
Question 2: How much should be budgeted for acoustic treatment, relative to the cost of recording equipment?
Acoustic treatment should ideally comprise a significant portion of the overall budget, potentially approaching or even exceeding the cost of recording equipment, particularly in smaller or acoustically challenging spaces. A room that sounds good will produce higher quality sound, even with simpler or more affordable gear.
Question 3: Is soundproofing the same as acoustic treatment?
No. Soundproofing (sound isolation) aims to prevent sound from entering or leaving the room, while acoustic treatment modifies the sound within the room. Both are important but serve distinct purposes.
Question 4: What is the minimal acceptable size for a residential recording space?
While larger spaces are generally preferable, a room of approximately 100 square feet (e.g., 10ft x 10ft) can function adequately, provided careful attention is paid to acoustic treatment and equipment placement. The overall acoustic character of the room should be the determining factor.
Question 5: Can a home recording studio be effectively built in a multi-purpose room?
Yes, but compromises are often necessary. Portable acoustic treatment options and flexible equipment setups can mitigate some of the challenges. Dedicated recording environments are generally preferable to rooms being shared for work and leaisure.
Question 6: What are some common mistakes to avoid in the process of building a home recording studio?
Neglecting acoustic treatment, underestimating the cost of necessary equipment, failing to plan for adequate power and cabling, and prioritizing aesthetics over functionality are all common pitfalls.
Prioritizing acoustic treatment, careful planning, and a clear understanding of recording goals are essential to creating an effective and productive residential recording environment.
The subsequent sections will explore methods for calibrating recording and mixing equipment to ensure accuracy and consistency.
Building a Home Recording Studio
The preceding discussion has illuminated the multifaceted nature of establishing a functional residential audio production space. Key elements, including acoustic treatment, equipment selection, software proficiency, workflow optimization, and sound isolation, have been identified as critical determinants of success. Prudent allocation of resources, thoughtful planning, and a comprehensive understanding of audio engineering principles are paramount.
The pursuit of a professional-quality recording environment within the confines of a home presents both challenges and opportunities. By adhering to established best practices and maintaining a commitment to continuous improvement, individuals can transform a spare room into a powerful creative tool. The ongoing evolution of audio technology suggests that residential recording studios will continue to play an increasingly significant role in the broader landscape of music production and audio engineering. Thus, the careful construction of such a space represents a valuable investment in creative potential.


![Best Recording Home Studio Desk [Setup Guide] Study Travel Abroad | Explore Educational Trips & Global Learning Opportunities Best Recording Home Studio Desk [Setup Guide] | Study Travel Abroad | Explore Educational Trips & Global Learning Opportunities](https://studyhardtravelsmart.com/wp-content/uploads/2025/12/th-552-300x200.jpg)


